Undervolting & “un-throttling” the Intel Atom Z3xxx Bay Trail CPU series (e.g. ThinkPad 8)

TL;DR: Support for Atom Z3000 series in ThrottleStop is amazing. At full load the temperatures of my ThinkPad 8 are 6-8°C lower, 1.5W less power draw, always-on Turbo Mode.

It recently came to my attention that ThrottleStop, a utility I had been using previously to undervolt my Fujitsu U2010 (Intel Atom Z530), is now finally available with support for the Intel Atom Z3xxx Bay Trail CPU series (used in Lenovo ThinkPad 8, ThinkPad 10, Dell Venue 8 Pro, Asus VivoTab etc.).
The Lenovo ThinkPad 8, while being a good performing mobile warrior device, is not known for being cool and conserving in terms of battery usage. The Intel Atom Z3795 CPU gets quite hot when under load. Lenovo’s thermal management includes heavy throttling/down-clocking of the CPU to stay within the bounds of TJmax of 105°C of this CPU. While the Lenovo Settings tool offer a hard to find/enable “Cool Mode”, it doesn’t do much to lower the temperature and battery consumption.

Naturally I was eager to test ThrottleStop on this device, knowing it was able to lower the voltage (Voltage ID/VID) of the Z530 CPU on my Fujitsu U2010, thus reducing the overall power draw + TDP of the CPU.

First off, here are the results running prime95 (64-bit, Torture mode, Small FFT, max. CPU heat/usage) with the stock clocking and CPU management. Running at a max. Turbo Mode VoltageID/VID of 0.63 V:

Without ThrottleStop, max. Turbo Mode VoltageID/VID of 0.63 V

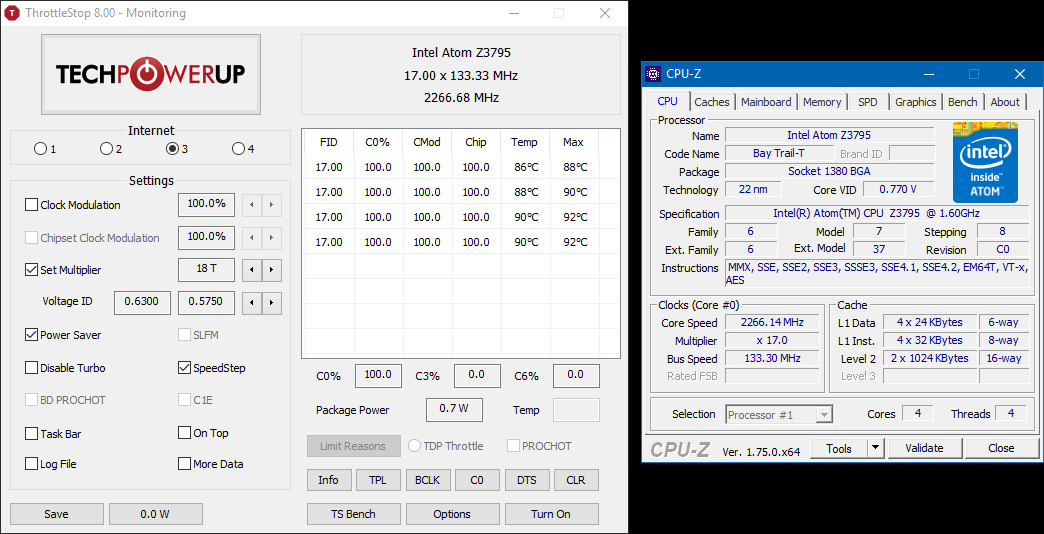
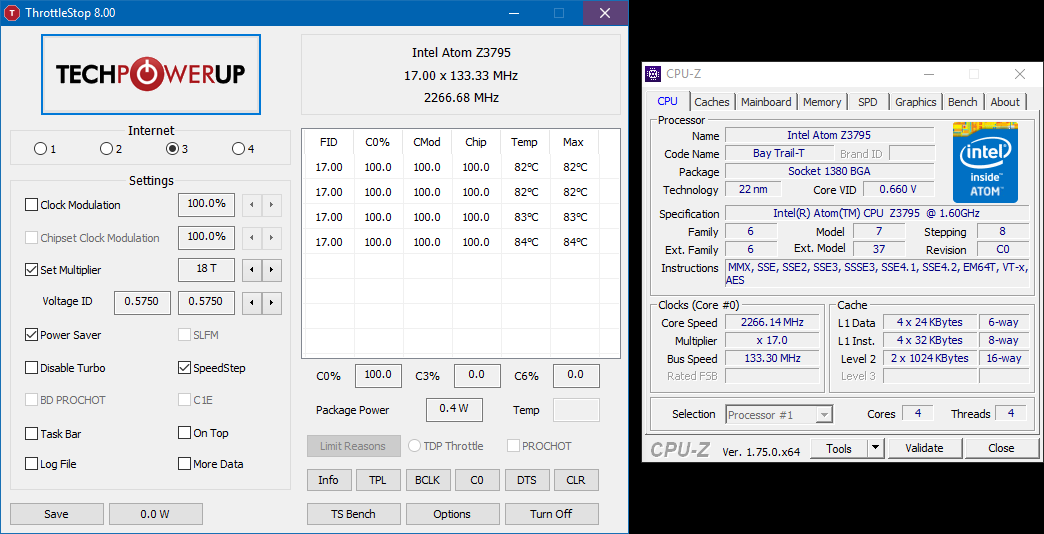
Now with ThrottleStop enabled, max. Turbo Mode VID set to 0.575 V (0.055 V lower), which I found to be stable on my device:

With ThrottleStop enabled, max. Turbo Mode VID set to 0.575 V (0.055 V lower)

As you can see temperatures are 6-8°C lower with ThrottleStop enabled – and that is with Turbo Mode constantly on! There is no throttling happening like with the stock CPU management. Battery draw on load is roughly 1.5 Watts lower: 7.3W versus 8.8W
These 6-8°C difference + constant Turbo Mode are especially great for playing occasional games on the device as there is more thermal headroom for the IGP to use, i.e. a lot less lagging + stuttering inherent to Lenovo’s stock thermal management.

If you want to give it a spin, ThrottleStop can be downloaded here.
Make sure to create a backup of your device first, since playing with the VID is what system tweakers call a “suicide run”, i.e. it will lock up/crash your system if you lower it too much. You might just lose data. As always with these types of tweaks: your mileage may vary, here be dragons, warranty void.
A QtQuick / QML preprocessor, the Q’n’D and KISS way

Lately, I have been porting the existing code base of QuasarMX to Qt 5. While the C++ core was migrated in almost zero time, porting the QtQuick 1 code to QtQuick 2 was not as straight forward. In a small experiment I decided to change “import QtQuick 1.1” to “import QtQuick 2.1” in all of the 600 files, to see how far that gets me. To my amusement it actually worked for almost all files. I only had to make some QtQuick 2 specific changes due to changed behavior in the new engine.
I hate to duplicate my code bases, especially if I still have to support platforms that only support Qt 4.7+ and QtQuick 1. It puzzles me how there is no preprocessor / macro functionality available in QML, especially if – like in my case – 99% of the QtQuick 1 code runs on QtQuick 2 without any modification other than changing the import section. Talk about detachment from reality…

So, here is a very quick-and-dirty preprocessor that will rewrite the import section and also apply line changes based on defines. It is inspired by the very simplistic notation of the preprocessor used in Octatask (paper), but the implementation is new. The preprocessor does not change the line count of the preprocessed files (read: debuggable) and preprocessing is reversible as no information is lost (read: unused lines are commented).

It is available here:
https://svn.katastrophos.net/kcl/trunk/qmlpp/ (yes, that is a Subversion repository)

The preprocessor is contained in the sub-folder “src”. It is comprised of the qmlpp.pri file for easy inclusion in your .pro file and qmlpp.sh, which is the Bash script doing the fancy substitution work (read: sed running humongous regexps). If you are using this on Windows, make sure to install Cygwin and put the location of bash.exe into your system’s PATH variable.

The sub-folder “test” contains an example project, that will compile and work on both Qt 4 / QtQuick 1 and Qt 5 / QtQuick 2. Check it out to get a feeling what you need to change to make your code work on both versions of the toolkit.

In your application’s .pro file you basically add the following code:

include(qmlpp/src/qmlpp.pri)

target_qtquick1: qmlPreprocessFolder(yourQmlDirectoryHere, @QtQuick1, 1.0)
target_qtquick2: qmlPreprocessFolder(yourQmlDirectoryHere, @QtQuick2, 2.0)

The exported function is defined as:

qmlPreprocessFolder(folders, defines, rewriteVersion)
  • folders: One or more folders relative to the $$PWD, separated by space. Example: qml js
  • defines: One or more defines to set, separated by space. Defines always start with @. Example: @QtQuick2 @Android
  • rewriteVersion: This defines the version to rewrite the line “import QtQuick x.y” to. Example: 2.1

In your code you can now set the defines as marker comments in the style of //@DEFINENAME:

@QtQuick1 define set:

     someFunctionSpecificToQtQuick1(); //@QtQuick1
     //someFunctionSpecificToQtQuick2(); //@QtQuick2

@QtQuick2 define set:

     //someFunctionSpecificToQtQuick1(); //@QtQuick1
     someFunctionSpecificToQtQuick2(); //@QtQuick2

This works for both .qml and .js files.

You can also stop the preprocessor from rewriting the line containing “import QtQuick” by adding the “//!noRewrite” marker comment to it:

import QtQuick 1.1 //@QtQuick1 //!noRewrite
//import QtQuick 2.0 //@QtQuick2 //!noRewrite

This is useful in those situations where you need more fine-grained control of the rewrite process.

Once you run qmake again, the QML preprocessor will rewrite your files. Make sure to save any pending changes before. I am working on a more generic and safe method of including the preprocessor to possibly rewrite the files during deployment-time or run-time.

The tool is also available via command line. This is useful for when you are rolling your own deployment scripts or if you are using CMake.

usage: ./qmlpp.sh [options] <filename JS or QML or directoryname>

OPTIONS:
   -h                Show this message.
   -q <major.minor>  The version of QtQuick to rewrite to. Example: -q 2.1
   -d <defines>      The defines to set, separated by |. Example: -d "@QtQuick1|@Meego|@Debug"
   -i                Modify file in-place instead of dumping to stdout.

FHEM module for ELV ESA1000 (WZ/Z/GAS) series of devices

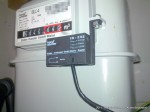
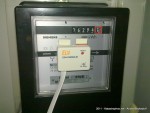
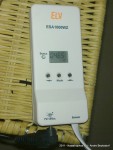
FHEM, the amazing home-automation server software, already has support for several sensors, meters and switches produced by ELV. In October 2010 I bought two meters, ESA1000WZ and ESA1000GAS for my house in the hope that FHEM would support them. Unfortunately it did not (at the time). I quickly found some hints that somebody, namely Gerd K., was working on adding support. So I contacted him and a day later received his module for testing. In the meantime eager in anticipation I was hacking away, duplicating the existing EM1000 extension and customizing it to read the raw strings coming from my Busware.de CUL 868 MHz USB adapter. While I got the power meter’s values (ESA1000WZ) figured out pretty quickly, it was a bit more involving to get correct readings from the gas meter (ESA1000GAS). Unfortunately Gerd’s code did not include support for the gas meter, so I emailed him my changes, but sadly never received feedback.
So today I am releasing my code on a works-for-me basis:

Download

UPDATE:Patch for FHEM 5.3 Version: Feb 10th 2013 for FHEM 5.3
Package for FHEM 5.0 Version: Oct 25th 2010 for FHEM 5.0

  • Supports ESA1000WZ power meter (infrared version, possibly others as well)
  • Supports ESA1000Z and ESA1000GAS gas meters (infrared version and version using impulse transducer for the Elster-Kromschroeder BK-G4)
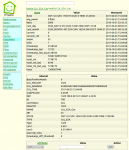
  • Features proper graph files to plot current and cumulated day/month consumption

Photos / Screenshots

Installation

If you are using FHEM 5.3, please download the tar-ball version (or SVN version for that matter) and directly apply the patch cul_esa-for-fhem-5.3.patch.

UPDATE 2: Here is a completely patched version based on the tar-ball version of FHEM 5.3: fhem-5.3-cul_esa.tar.gz Version: Feb 10th 2013

If you are using FHEM 5.0:
Copy 19_CUL_ESA.pm and all .gplot files to your FHEM directories.
Sadly adding autocreate support and extending the CUL module to understand the raw message strings requires patching. Check cul_esa-for-fhem-5.0.patch to patch the files. This was diffed against the Debian package of FHEM 5.0. The very same version of FHEM as tar.gz has some differences in the sourcecode and some files missing. I contacted the author of FHEM about this issue but he has not updated the packages yet. So if you run into issues here it is probably due to these differences.

UPDATE 1: Here is a completely patched version based on the Debian package of FHEM 5.0: fhem-5.0-cul_esa.tar.gz Version: Oct 25th 2010

Here are some notes in German I made while developing the module, mostly concerning the different behavior of the ESA1000GAS compared to the ESA1000WZ:

Der ESA1000GAS mit dem ESA1000Z-Messgerät verhält sich leider anders als das ESA1000WZ, sodaß ich wieder die Korrektur-Faktoren einbinden mußte.
Ich konnte nicht herausfinden, wozu der übermittelte Tick beim ESA1000Z dient. Zwar ändert sich dieser mit geänderter Zählerkonstante, allerdings ergibt der Wert im Zusammenhang mit den von der Einheit übermittelten Werten keinen Sinn, sodaß ich hier direkt mit der Zählerkonstante multipliziere, um die Kubikmeter zu erhalten, und dann zusätzlich noch mit dem Umrechnungsfaktor (bei der EWE ergibt sich dieser aus der Zustandszahl * Brennwert Hs) multipliziere, um die Kilowattstunden aus der Gasmenge zu erhalten.
Leider ändern sich damit die Parameter bei der Definition:

Stromzähler:
define CUL_ESA_286 CUL_ESA 1925 286 1 1 23.086
also:
corr1 = corr2 = 1 (und damit wirkungslos)
CostPerUnit = 23.086 Cent/kWh

Gaszähler:
define CUL_ESA_798 CUL_ESA 1429 798 0.001 9.5154 4.5339
also:
corr1 = 0.001
corr2 = 9.5154 kWh/m3
CostPerUnit = 4.5339 Cent/kWh

Ich habe ebenfalls noch einen Durchschnittswert in Kilowatt implementiert, sodaß man die Durchschnittleistung einigermaßen sinnvoll in einem Diagramm darstellen kann. Hier gab es allerdings bei meinem Drehstromzähler Probleme mit Unterabtastung, weil sich die Drehscheibe bei geringem Verbrauch zu langsam dreht, sodaß das Meßgerät zwischendurch schon Nullwerte zurückmeldet, weil kein Impuls eingegangen ist. Dafür habe ich einen entsprechenden Schwellenwert bei der Berechnung des Durchschnittswertes implementiert. Nicht schön, funktioniert aber für meine Zwecke.

Upgrading the Fujitsu U2010 with a new 120GB SSD

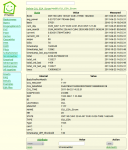
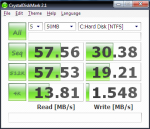
Lately my Fujitsu U2010 was running low on disk space. Having already maxed out the SD card slot with a 32 GB SD card, the only way to go was to replace the internal ZIF-PATA drive. The first generation 64 GB Samsung SSD that I moved from my previous U810 to the new U2010 (see here) is no speed demon but a very reliable and robust performer featuring SLC flash memory. Naturally, I was looking for a faster, bigger and cheaper replacement drive. There are some more 1.8″ 128 GB ZIF drives available, most of them are MLC-based drives well over the 300 Euro price range. I came across a pretty cheap drive produced by a company called Mach Xtreme Technology, a newcomer in the storage segment. The MX-NANO ZIF 120 GB model (MXSSD1MNANOZ-120G) is available here in Germany at several online retailers priced at around 200 Euros. Not cheap compared to a speedy SATA SSD drive, but inexpensive in terms of how uncommon and rare this form factor is. And of course the drive is way cheaper than what I paid for the first-gen Samsung SSD back in 2008. :)
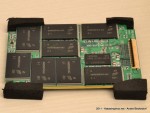
The Eastwho EWS720A controller used in the drive seems to be a solid performer with very good performance figures for what is possible in terms of the old PATA interface. The drive uses 25nm Intel/Micron MLC flash memory (29F64G08CBAAA).
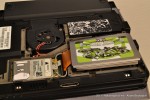
The big problem with this drive is the very unfortunate alignment of the ZIF socket. Unlike any other 1.8″-drive I came across, this drive has to be installed upside-down due to the idiosyncratically flipped ZIF socket. I can only assume this drive was mainly designed as replacement disk for the last-gen iPods or first-gen MacBook Airs. The drive per se will not fit into the Fujitsu U2010 without modification. This is probably true for a lot of other UMPC and netbook devices, too.
The only way to get the drive installed is to remove the metal enclosure. The flat-ribbon ZIF cable can not be twisted due to its length. Removing the enclosure will ultimately void the warranty as you will have to break the seal on it. That is a risk I am willing to take. Either way, I have been running the drive for more than a month now and had no problems whatsoever. Great performance compared to the old Samsung drive.
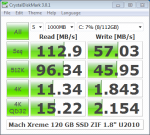
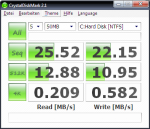
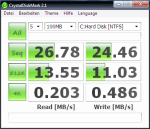
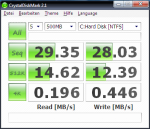
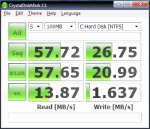
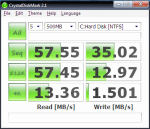
Below are some obligatory benchmark screenshots, though I have to mention that Eastwho states that their controllers are not benchmark-friendly due to the techniques they employ to ensure low access times.

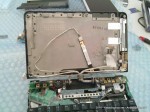
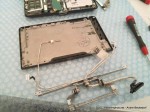
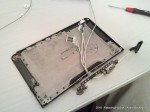
Replacing the hinge and LCD back cover of a Fujitsu LifeBook U2010 / U820

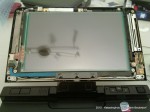
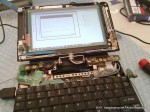
I recently had to replace the hinge on my Fujitsu U2010, not because the hinge itself broke, but rather because I damaged the cable on one of my recent hacks. Fortunately I only damaged a part of the USB cable that connects the webcam to the mainboard. However, the cable harness is contained in the display hinge and can not be replaced separately, so I had to buy the whole part.
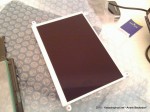
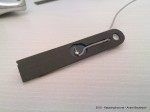
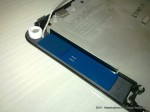
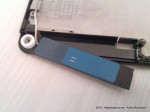
The replacement procedure is quite involving and delicate. While I was at it I also replaced the back cover of the display on my unit and replaced the pink back cover (my U2010 is a second hand unit) with a beautiful black cover. However, the particular cover I bought was from the US 3G version of the U820 – the one with the retractable antenna. I was not able to find the antenna assembly part so I had to brew my own…

Intel 5300 AGN WiFi in Fujitsu U2010/U820

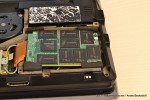
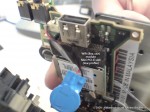
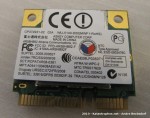
I recently replaced the Atheros WiFi card in my Fujitsu U2010 with an Intel 5300 AGN half-sized Mini-PCIe card. The default Atheros Wifi card in the Fujitsu does not support MIMO and 802.11n on the 5 GHz band. This is a real let-down for a (draft-)N card.
Luckily the Intel 5300 AGN is one of the very few cards that are available in the half-sized Mini-PCIe form factor, so it fits into the Fujitsu U2010 and U820.

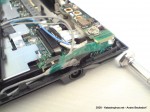
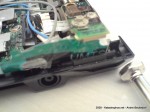
The process is quite involving and not for the faint of heart. Here are some snapshots of the process:

Some of the pictures show my 3G/HSDPA mod.
Also check out the interesting forum thread over at pocketables.

Quick-and-dirty DIY 19″ rack

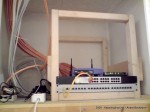
Why buy an expensive 19″ rack when you can build it yourself for 8 Euro and a bit of work?

There is no magic here. The ingredients are really simple actually: A few pieces of wood, screws and glue.
The construction is rigid. No angles are required due to self-stability of the quadratic frames. Just make sure the inner length of each edge is exactly 19″ (48.26 cm). Glue and screw the pieces together and that’s it.

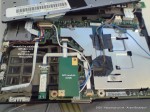
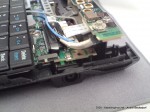
Retrofitting the Fujitsu LifeBook U820/U2010 with 3G/UMTS/HSDPA

So, I replaced my U810 with the newer U2010 model a few weeks back. Contrary to the U810 the U2010 has an empty and functional Mini PCI-E slot. I am using the O2 Internet-Pack L plan here in Germany a lot and tethered my Sony Ericsson K850 with the U810 before, which was quite a problem since this setup used to drain the batteries of my mobile phone quite fast due to UMTS/HSDPA + Bluetooth connectivity. I figured an internal solution would work better in my case. :)
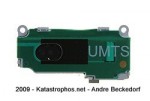
The Novatel Expedite EU850D Mini PCI-E card seems like a good fit since it already includes a SIM card slot on board and is readily available via several retailers.
The big problem with this solution however is the fact that the U2010 is so crammed internally that it is hard to add any new conventionally available antennas. The device already has six antennas: two for Wifi, two for GPS, one for Bluetooth and one for the FM Transmitter. However I was not able to use any of these without sacrificing the functionality of these connectivity options.
Some retailers offer antennas with the module which are to be installed in the display lid and are too big to fit into the casing of the U2010. I refrained from opening up the lid and was looking for a different solution instead:
Why not use the same antenna a mobile phone uses?
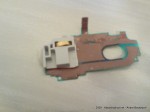
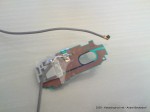
As luck had it, a friend of mine had a broken Sony Ericsson K800i lying around, which I took apart and removed the antenna assembly from. You can also get the whole assembly as replacement part from several dealers at eBay. Fortunately the antenna is a film based one which can be stripped away from the plastic part it is fixed on. Due to the flexible form of the antenna you are free to place it almost anywhere in the case.
So I got an antenna cable with a Hirose U.FL / IPAX pigtail and soldered the other end of the cable onto the copper pads of the film antenna.

If you intend to do the same here is a word of warning: Be sure to use a placement inside the casing that is not covered by the silvery radiation shield coating as it will dramatically reduce the reception quality of the signal. I had to sand down some of the coating to get better signal strength. Your mileage may vary.

Setting up the Inno Setup compiler on Debian

I’m currently setting up a nightly build system for Quasar on my Linux box which is running Debian. This system also cross-compiles Quasar for Windows.
The Windows version of Quasar is going to be available in two fashions: one self-contained, portable version and one version that can be installed.
I’m not a huge fan of installers. But when it comes to creating a setup program for a given Windows application I’m quite accustomed to Inno Setup having used it for years. Unfortunately there is no native Linux version of the Inno Setup compiler available for Linux. NSIS exists as package for Debian but I am not fond of using it, largely because I am a Delphi guy. :)
So, here is a small guide on how to get the Inno Setup compiler up and running on Debian:

First step is to install Wine either as super user or by using sudo:

sudo apt-get install wine

As normal user fire up your X server and your favourite terminal application and get the latest Inno Setup QuickStart pack:

mkdir /tmp/innosetup
cd /tmp/innosetup
wget http://files.jrsoftware.org/ispack/ispack-5.2.3.exe
wine ./ispack-5.2.3.exe

This will start the installer in Wine. Note, for the installation you will need a running X11 server since the installer obviously is graphical. If you have not set up Wine before, the default location C:\Program Files\Inno Setup 5 will install to ~/.wine/drive_c/Programme/Inno Setup 5.

Luckily the Inno Setup compiler offers a command line interface, ISCC.exe, which will run in Wine without the necessity of having a X server running. So it is ideally suited for automated runs.

Here is a simple wrapper shell script called iscc:

#!/bin/sh
unset DISPLAY
scriptname=$1
[ -f "$scriptname" ] && scriptname=$(winepath -w "$scriptname")
wine "C:\Program Files\Inno Setup 5\ISCC.exe" "$scriptname" "$2" "$3" "$4" "$5" "$6" "$7" "$8" "$9"

I installed this script in my local bin directory (~/bin) and added it to the PATH environment variable.
This will allow running the Inno Setup compiler from anywhere and it also makes it very easy to integrate into a build script. You can even feed a script via stdin, e.g. something like:

iscc - < ./myscript.iss

Upgrading the Fujitsu U810 with 64GB SSD

I recently decided to upgrade my Fujitsu U810 with a solid state drive.
Unfortunately, since the U810 only offers a PATA interface the options are quite limited to just a few high-priced (compared to SATA) 1.8″ SSD models by either Samsung, Sandisk (SanDisk SSD UATA 5000, discontinued) or MTRON (MSD-PATA3018-032-ZIF2 et al.).
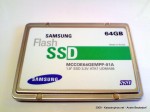
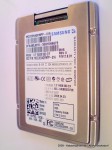
I went for a 64 GB SLC drive manufactured by Samsung. The exact model name is MCCOE64GEMPP. The same 1.8″ PATA-drive is available as bulk version without the metal enclosure that is protecting the PCB: MCCOE64GQMPQ

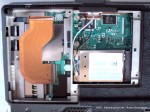
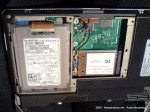
Here are some photos of the drive itself and how to install it in the U810. Note, the drive is 5 mm high and will fit into the U810 without any modifications.
Also keep in mind that the U1010 has a different connector (50-pin IDE instead of ZIF), so these ZIF-drives will not work here. However, there are reports on UMPC Portal that suggest that it is possible to get a replacement connector flat band cable for the U810 that is the 50pin IDE cable, so I guess it is also possible the other way around for the U1010.


dsc00321dsc00323
dsc00238dsc00324

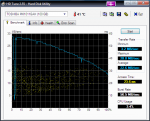
Here are the obligatory benchmarks comparing the new SSD against the old Toshiba MK1011GAH 100 GB hard drive that was previously installed in the U810:


Toshiba MK1011GAH:

hdtune_info_toshiba_mk1011gahhdtune_benchmark_toshiba_mk1011gah
crystal50crystal100crystal500


Samsung MCCOE64GEMPP:

hdtune_info_samsung_pza064_ssdhdtune_benchmark_samsung_pza064_ssd
crystal50_samsung_pza064_ssdcrystal100_samsung_pza064_ssdcrystal500_samsung_pza064_ssd

Needless to say that applications cold-launch a lot faster with the SSD. (Firefox with 12 add-ons: ~10 s before -> ~6 s after, Chrome: ~3 s before, ~1 s after, Thunderbird: ~8 s before -> ~3 s after).

Startup time was reduced quite a bit but not dramatically. However, returning from sleep and hibernate saw a huge improvement. Unfortunately I can not provide values of the old drive, so no comparison.
I did not notice longer battery run times. However, the whole system runs a lot cooler because the SSD naturally does not produce heat as extensive as the HDD did.

I am satisfied with this upgrade – especially since it has boosted compile-times when working with CodeGear RAD Studio and Delphi – due to the great performance when accessing, reading and writing small files. Your mileage may vary.